| Table of Contents |
|---|
...
Login to PortConnect. If you do not have a login, you will need to Register.
Select Services > Shuttle Connect. If this option does not appear, please contact User Support info@portconnect.co.nz. This service is only available for trucking companies and freight forwarders.
...
Step by Step guide
The Shuttle Connect screen allows users to manage the priority status for Import containers up until 6 hours before the vessel ETA.
...
Select the Shuttle Connect item from the Services menu in PortConnect.
Search the container number. Containers will display with a status of Available or Unavailable.
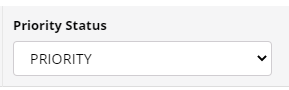
Select the priority status (see Types of Priority Status below) by clicking on the drop down menu.
Click Update / Auto-request.
If the container is successfully managed it will display a Management Party and the Priority Status would show as Priority.
current Availability Status is AVAILABLE then the Priority Status will update and the Management Party will display the name or your organisation.
If the current Availability Status is UNAVAILABLE then an auto-request will be created and the details will show in the Auto-Request Details column. The Priority Status will remain as Standard but the Auto-Request Status will show your desired Priority.

If you need to change the Priority from PRIORITY back to STANDARD then you need to CANCEL your Auto-Request by clicking the red X in the options column.
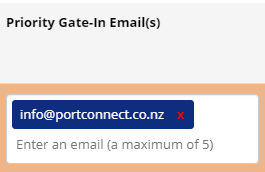
You can enter up to 5 email addresses in the ‘Priority Gate-In Email(s)’ field to receive the Notification for each container managed:
...
Auto-Request Details
If there is no container record in PortConnect yet, an auto-request priority move can be made. The system will re-try priority auto-requests for up to 14 days, at which point the request expires and will need to be requested again by the user.If a container is Unavailable and you set the priority it will create an Auto-Request.
If the container has MPI Clearance then the container priority status will automatically be updated. If the container has not met these requirements during this time the Auto-Request will lapse and the container will automatically disappear from the screen.
...
Status Definitions
Status | Meaning |
|---|---|
UNAVAILABLE | Container is unavailable to be managed - this could be because the container is not yet in the port's system, it is already discharged or it does not have the right clearances in place |
UNAVAILABLE / AUTO-REQUESTED | Container is not available and there are existing auto-requests in place. If there are multiple auto-requests in place the first one created will be the one that is submitted to the port if the container becomes available for management. |
AVAILABLE | Priority is available to be managed. |
AVAILABLE / AUTO-REQUESTED | Priority is available to be managed. An existing Auto-Request has been set up by your company and will shortly process the requested status. |
Status Messages
The request screen shows Status Messages which can include extra details from the port or confirmation of the success/failure of an update. Below is a table showing the different validation messages and what they mean.
Validation Message Text | Meaning |
|---|---|
Container requires clearances to move | The hold must be removed before a status can be managed. |
Container is already managed by XXXXXXX | User will need to contact the Trading Partner to amend the status. |
Vessel Arrival is too close to modify containers | Containers can be managed up until 6 hours before vessel arrival. |
NO ACTIVE UNIT FOUND | Container is not yet active in the port's system. |
ACTIVE UNIT IS NOT AN IMPORT | Container exists in the port’s system but is not an Import. |
ACTIVE UNIT IS NOT INBOUND | Container has been discharged into the seaport yard. |
...
Cancelling Priority Status
Follow these steps to request a cancel Priority Status:
Click the red cross cancel button in the options column
A pop-up will appear to confirm cancellation, click ‘Yes, Cancel’.
Only the Trading Partner that managed the auto-request can cancel it.
Auto-requests will be displayed for 14 days and then will automatically disappear from the screen.
...
View Priority Status in Subscribed Track & Trace
...